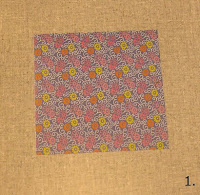
I promised Johanna to do a how to make a star post. If you're not her you might still find yourself bored or stuck on an inhabited Island one day with a bunch of post it notes. This is really easy and great fun. I just made all these steps to try to make it clearer...
2. Fold it once creating a rectangle. I used a paper with different colored sides. The patterned side is the one that will show.
3. Make sure you have the fold from the last step closest to you (it's fold in the bottom of my picture). Imagine a line trough your rectangle that would create two smaller squares. You want to find the point that's in the very center of your left imagined square shape.
4. & 6. By making two loose folds like this you figure out the where the mid point is. Do not make these sharp folds. Their purpose is just to leave a small mark.
7. You now make a sharp fold from the right to the center of the square . The right bottom corner of the rectangle should end up in the point you marked through steps 4 & 6.
8. *After making the sharp fold you fold the right corner back again creating a kind of triangle shape.
* You then fold the other (left) corner towards the triangle creating what you can see in 9.
10. Fold back creating the triangle shape seen in 11.
11. Turn your triangle over.
13. You now make a cut like this. You can start cutting in the corner of the smaller triangle or a little below. Make sure the different layers of paper doesn't slide when you cut.
14. The smaller piece you cut off becomes your 5 point star.
15. & 16. You now just have to adjust the folds of the arms of the star making them mountain folds to create a star that's standing out. (Some of the folds are inwards and needs to be adjusted.)
Hints: The angle you cut in in the last step determines the result. If you want to create a Swedish decorative advent star with a light in it to hang in a window you have to make two stars and put them together. You then have to cut at the exact same angle both times so it's s good idea to make small marks before you make the cut. You have to cut at a different angle than I did taking the pictures. My star is to pointy to be put together with another star. Cutting off a bigger piece of paper in the last step would create a star that would be more suitable. It's a good idea to use post it notes to practice on before you go full scale. Or stick with the smaller stars and put them on your Christmas presents or hang them in your tree.


1 comment:
Svar: Coolt! Den måste jag verkligen testa att göra! Jag hittade en kul stjärna man kan göra själv i papp förra året. Så här är ett litet tips från mig:
http://johannab.se/2008/12/04/gor-en-julstjarna/
Kram
/Johanna
Post a Comment